Let’s be honest!
Every boat owner loves to marvel at their own boat. Say whatever you want, but being a mariner myself, I know how we feel about our watercrafts. We can’t just stop adding new equipment and modifications, right?
Having an audio system is one of the very basics of a mid-size vehicle. And, if you have got yourself a luxury boat, you’ll have it set already.
But, in case your boat did not come with stereo speakers already included – boy, you need help!
Seat back and let me show you how to install marine speakers on your boat.
Related Guide: Best Marine Stereo System Review
Table of Contents
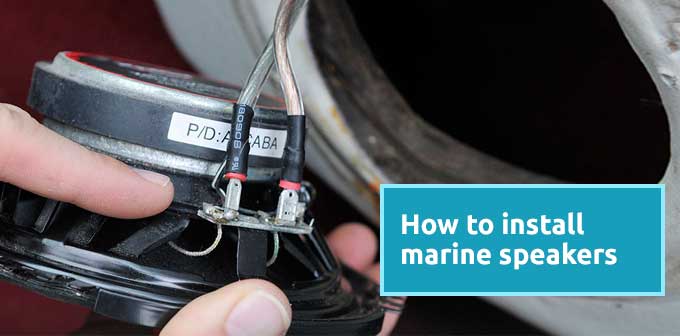
How to Install Marine Speakers?
Remember all boats are not the same, so your ride might have a different set of pockets for radio and speakers. That is why my instructions may not seem pretty accurate on certain terms, but hopefully, it will get your job done.
Step 01 – Neat & Clean Wiring
So, here’s the very first thing to do. Based on how many sets of speakers you have planned to install, select their installation spots. Make sure, everything is clean & dry, and the wiring gets in the way to your stereo or radio.
Now, take the right amount of speaker wire through split looms. This will protect the wire as you run them from your speakers to stereo.
Step 02 – Let’s Connect Them All
After you have run the split looms properly, it is time for connecting the wires. White, gray, green, and purple – these four are the speaker wires from your radio harness. You will have to plug them into your desired pairs of speaker wires themselves.
Nonetheless, I gently recommend anyone to have a glance of their radio or stereo manuals once.
Moving ahead, the front right speaker should have the gray and gray-black wire, and the front left will be white and white-black.
Let’s say, you are having two sets of speakers. So, there will be a rear driver’s side right and left passengers’ side speaker as well. Cable colors should be purple and purple-black, then green and green-black respectively.
This is how you do the connection to the wiring harness. Strip the wires and use buck connectors to ensure the connections are safely insulated.
Step 03 – Cut Holes for Your Speakers
As you have got all the speaker wires hooked up by now, let’s fire in the holes. Right underneath the areas where you are gonna place those front speakers. You can make a template and mark on both sides, so the cuts stay evenly spaced.
A 5-inch hole saw will help you with smoothly-cut holes for my personal favorite; Kenwood marine speakers. FYI, you’ll have your own cuts based on your speakers’ dimensions.
Step 04 – Mount the Speakers
Almost done! Just tighten the speakers down to places and don’t forget to get the wires in the back hooked up to them. Double check if the negative and positive are hooked up correctly.
Yup, you are all set. Turn on the radio or play your favorite track, check it out. Let me know if you had any issue while installing your speakers. I will be right here to help you out.
Cheers for now!